Before you get started
Welcome to Project Target – a sales performance management tool.
What you need to know about Project Target
Project Target is mobile&web based software, designed to help sales-oriented companies run their business in an easier and more accessible way.
A key objective of Project Target is to lead salespeople toward their goals, help them monitor their performance and keep them focused.
Project Target gives management the right tool for the guidance of their sales forces and provides safeness that their organization is always on the right path.
Login
There are three ways to access Project Target:
- Web app – Use the link app.projecttarget.net
- iOS app – Open the App Store and search for “Project Target”. Click “INSTALL”.
- Android app – Open the Play Store and search for “Project Target”. Click “INSTALL”.
Get your login credentials from the company you work for, and you are ready to go!
Dashboard
The dashboard is one of the most important tools in Project Target, made for pursuing projected targets and for monitoring key performance indicators (KPIs), both for departments and users. Depending on your permissions, you can use the dashboard to track not just personal metrics, but also the metrics of other departments or users.
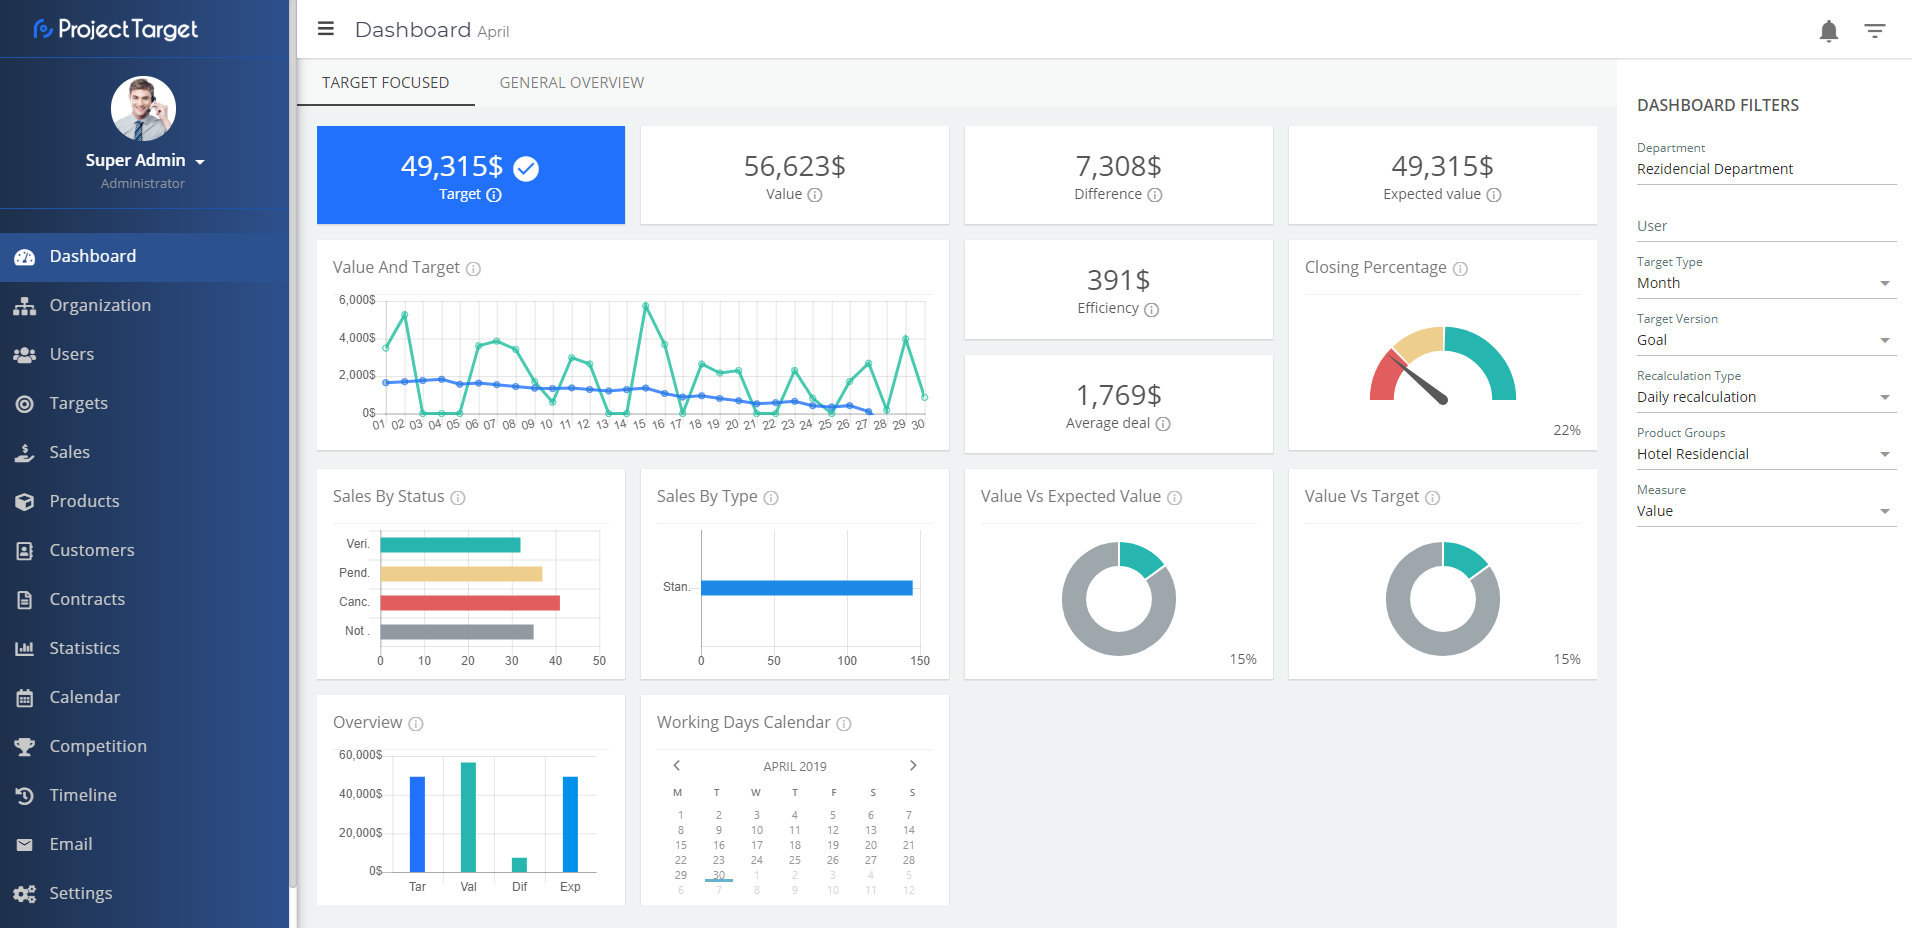
The dashboard is target-oriented. With the target in focus and its associated KPIs, it drives a department or a user to success. The dashboard shows only one department or user at the time.
 Filters
In order to get the target and it’s respective KPIs you have to choose the DASHBOARD FILTERS:
- Department (type the name of a department)
- User (type the name of a user)
- Target Type (choose the period, e.g. current day, week, month, quarter, calendar year or fiscal year)
- Target Version (choose a higher/lower target version)
- Recalculation Type (choose the algorithm for target recalculations)
- Product Group (type the name of the product group)
- Measure (choose the measure, value or quantity)
The dashboard will allow you to see only active departments and users. Additionally, departments and users must have assigned (active) targets, in order to appear in their respective search fields. Permissions are also taken into account.
Organization
Organization module intends to replicate a company structure into Project Target. In order to do that, first, you need to add Company details and Location(s) where your company operates. Next step is to recreate organizational structure by adding departments and creating parent-child relations between them. The result is an organizational tree that matches the real-world organization. The latest step is to assign users to their departments.
It is important to know that the access to specific data within a complete Project Target system is directly related to the position in the organization tree. This data access is managed by user/role permissions, in the Settings module.
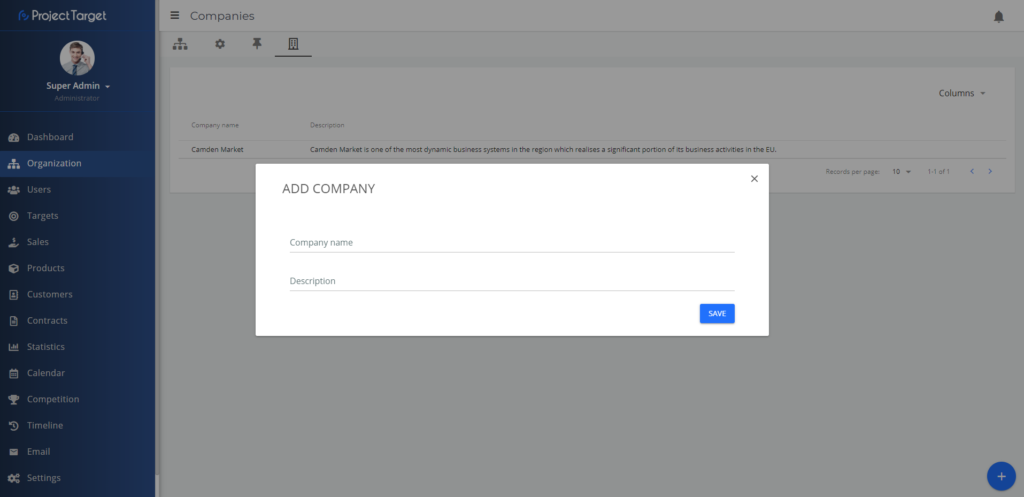
 Company
First, add your company name and description. It is possible to add multiple companies in one Project Target environment, but basically, companies just serve to mark departments, to know where each department belongs. There is no hidden logic behind it.
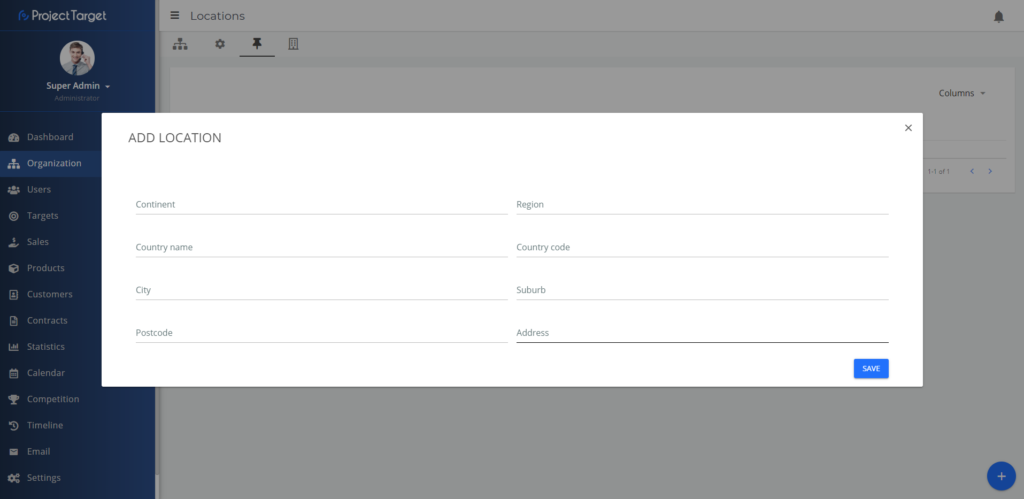
 Locations
Add locations where your company operates. This should be done by following international standards, meaning all fields in the screen below should be filled with internationally recognized codes (country, country code, city, etc.). This is important if you have multiple locations and you want to know your sales statistics per GEO location.
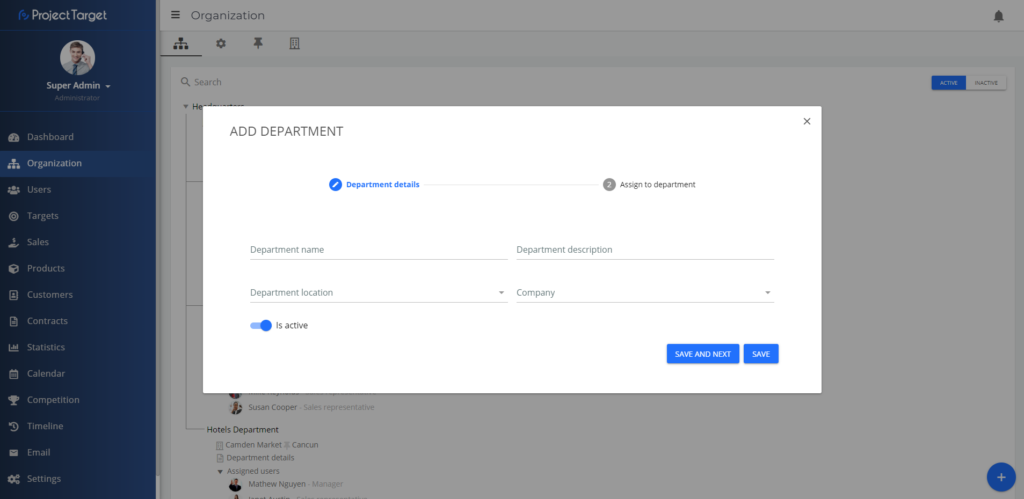
 Departments
Add department name and description and choose its location and company it belongs to. In the next step, choose the parent of the department and set the start and end date of their relation. Each department can have only one “parent” at the time. In case when a department needs to be moved to a different place in the organization, the relation to its parent needs to be closed and new parent must be assigned (this is done on Department details page).
The result is an organizational structure (tree):
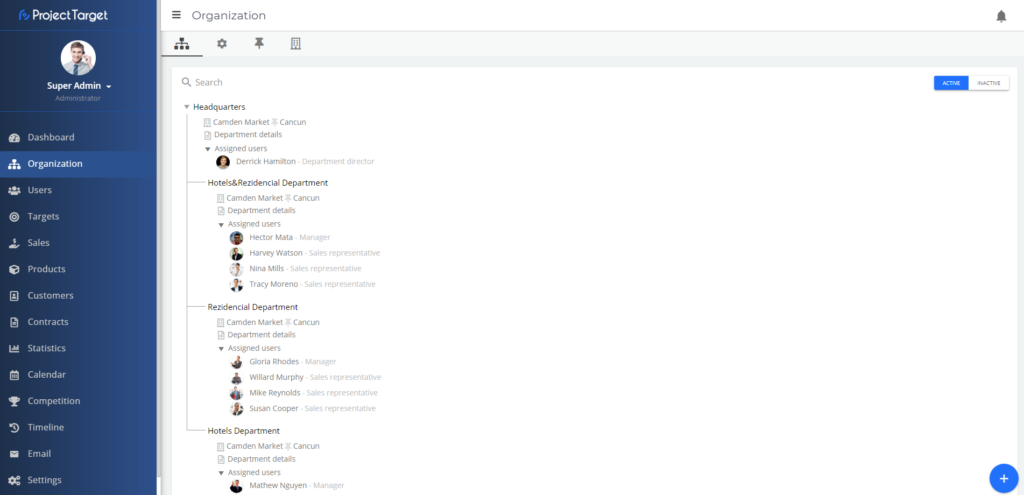
Click on Department details to assign users. Multiple users can be assigned at the same time and what is important is to set a start and end date for the period the users will be part of the department. Also, you can edit department details, change the parent of the department, check it’s working days, deactivate the department and even delete it.
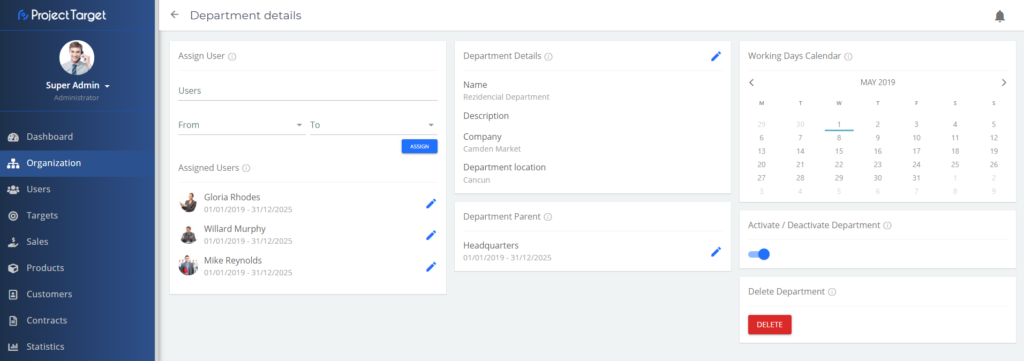
IMPORTANT! Be careful when deleting department, because you will lose all the historal data related to that department. We strongly suggest you deactivate department instead, in case of need.
Settings
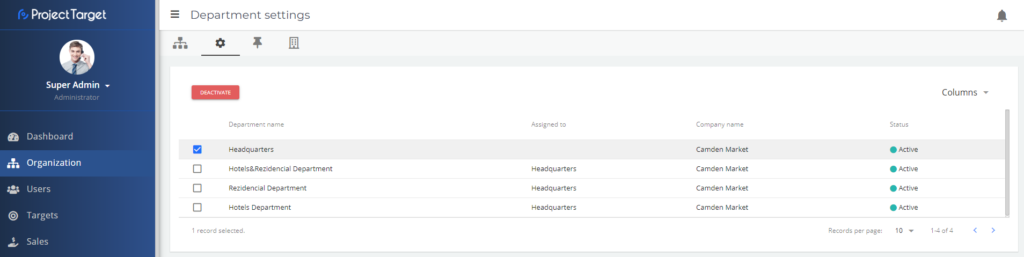
Deactivating department in case of need is simply done by selecting the wanted department and by clicking on “DEACTIVATE” button.
Users
Users And Permissions
Usually, the system administrator adds users and assigns them with their roles. Roles are prepared by the vendor of Project Target, based on client’s requirement. Each role’s permissions can be edited later on (in Settings module), by the system administrator – a person trained to manage the Project Target system within a company.
Project Target implements permission control at the user and role level. Each user in the system can be assigned with just one role and permissions are inherited from that role. Additionally, permissions can be assigned directly to a user. If a user has a role permissions and directly assigned ones, those will be combined and the user will have the union of both.
 Adding new users
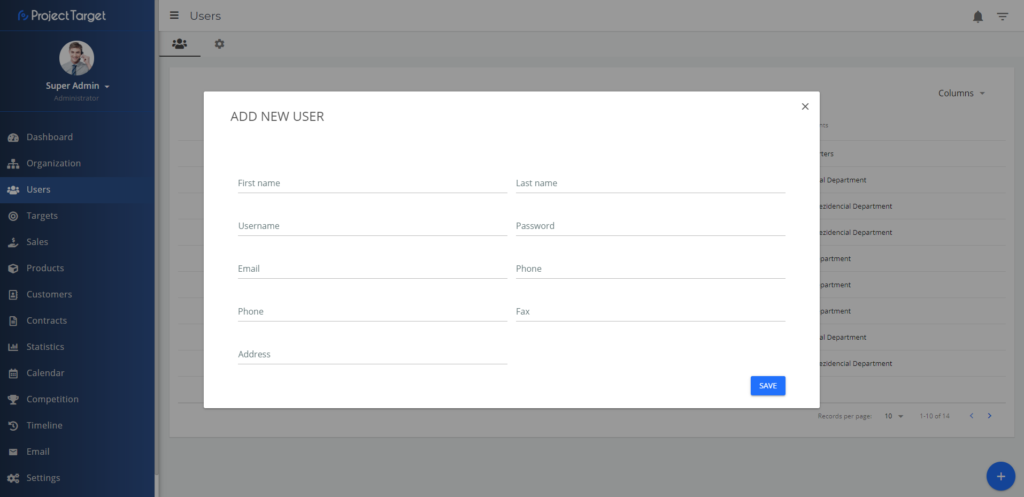
Any user, with the right permissions (usually administrator or manager), can add new user accounts in Users module, simply by using the “Add” button ![]()
The result is a list of users. Users can be filtered by using the USERS FILTERS on the right side menu.
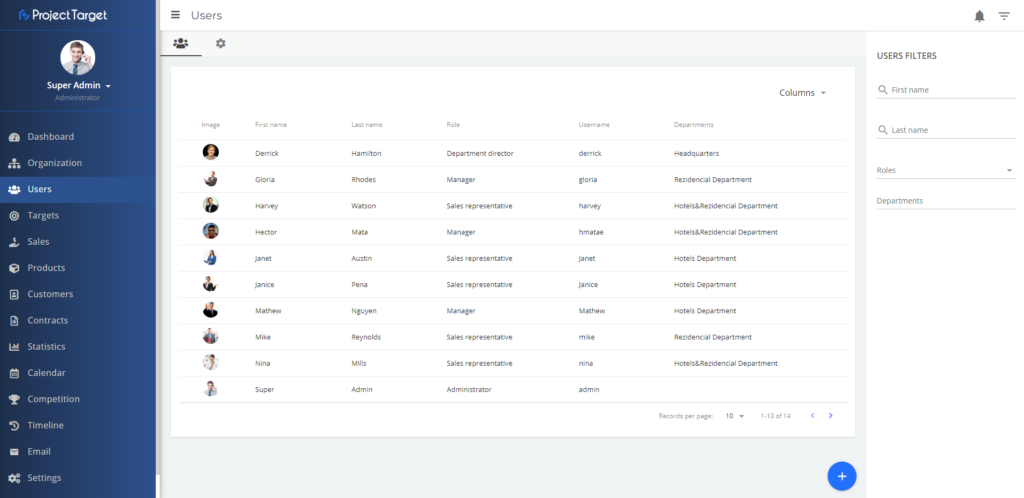
In order to edit personal details of a user, you can go to the list of users, click on a user, and you will access the profile page of a user. There you can change the picture, username, password, etc. Also, you can check to which departments user was assigned, you can deactivate the user and even delete it.
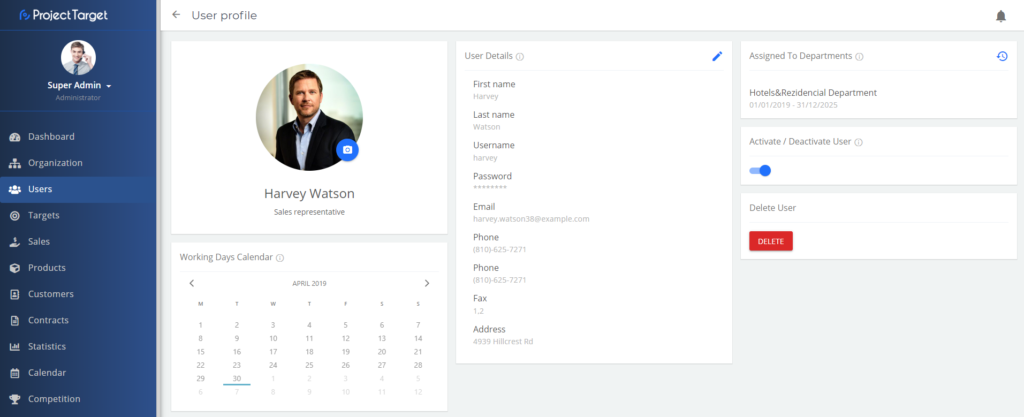
Note that users can access their profile pages and edit some details, so be sure to define user/role permissions, in Settings module, according to your needs (e.g. forbid users to activate/deactivate and delete their accounts).

IMPORTANT! Be careful when deleting a user, because you will lose all the historical data related to that user. We strongly suggest you deactivate the user instead, in case of need. It is described in the following chapter.
Settings
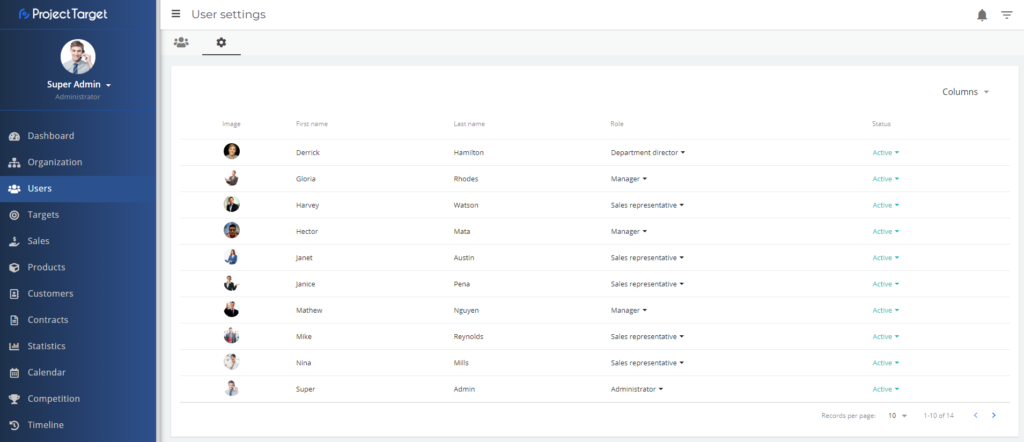
Activating/deactivating a user in case of need is simply done by switching the active/inactive options in the Status column.
Deactivated user cannot access Project Target.
Additionally, you can change the user’s roles in the Role column. With a different role, the user gets a different set of permissions.
Targets
Important things to know about the targets
A department or a user cannot have duplicated targets! They are not allowed to have two active targets with the same versions, recalculation types and product groups for the same period (overlapping start/end dates).
In case there is a need to add the same target to a department or a user, the existing target has to be deactivated.
Target types are Daily, Weekly, Monthly, Quarterly, Yearly and Fiscal Year. When a target is initially added, it is split into Target types automatically.
Target version enables the system to have similar targets but with different values/quantities – e.g. Goal and Super Goal.
Recalculation type is the algorithm that creates targets dynamics. It can be customized per client’s needs.
A product group is a useful option for clients who want to focus more on their product groups separately.
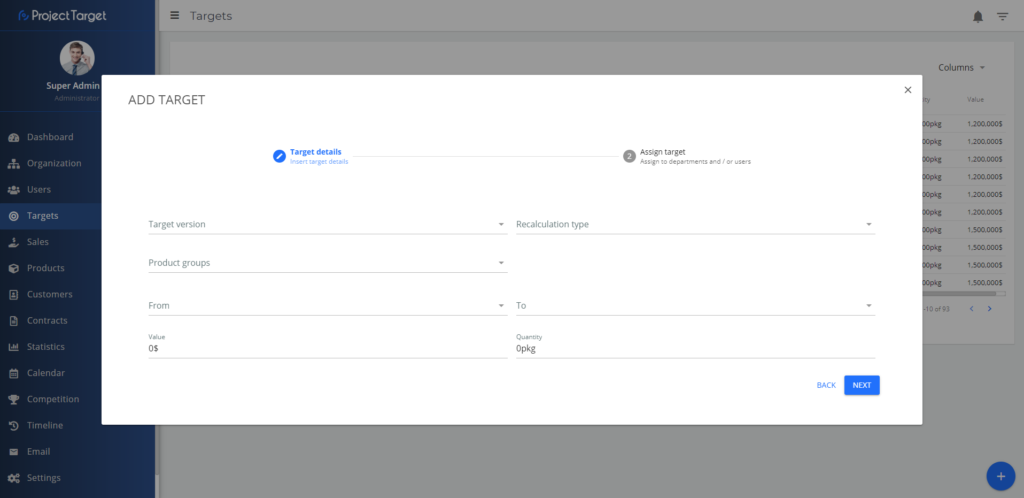
Adding new target
Any user, with the right permissions (usually administrator or manager), can add targets in Targets module, simply by using the button ![]()
The same target can be assigned to multiple departments or multiple users.
The result is a list of targets. Targets can be filtered by using the TARGETS FILTERS on the right side menu.
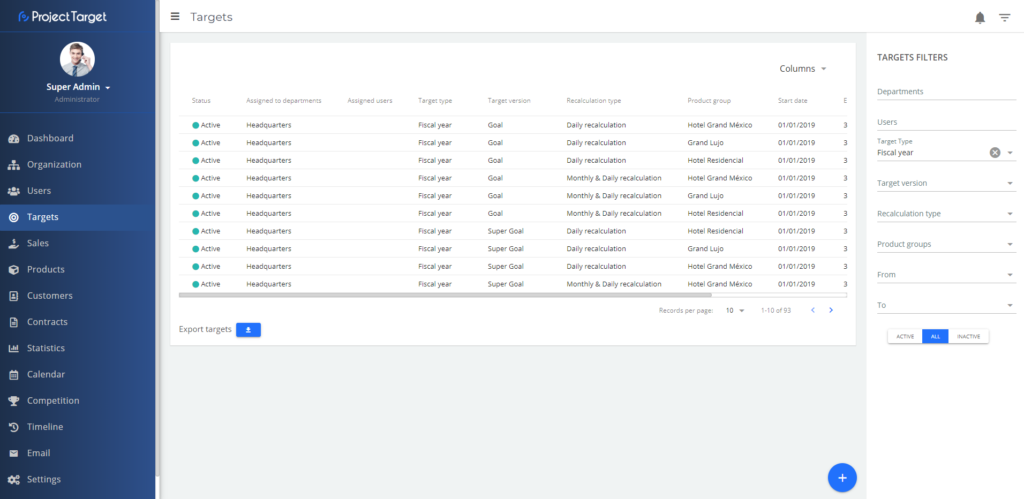
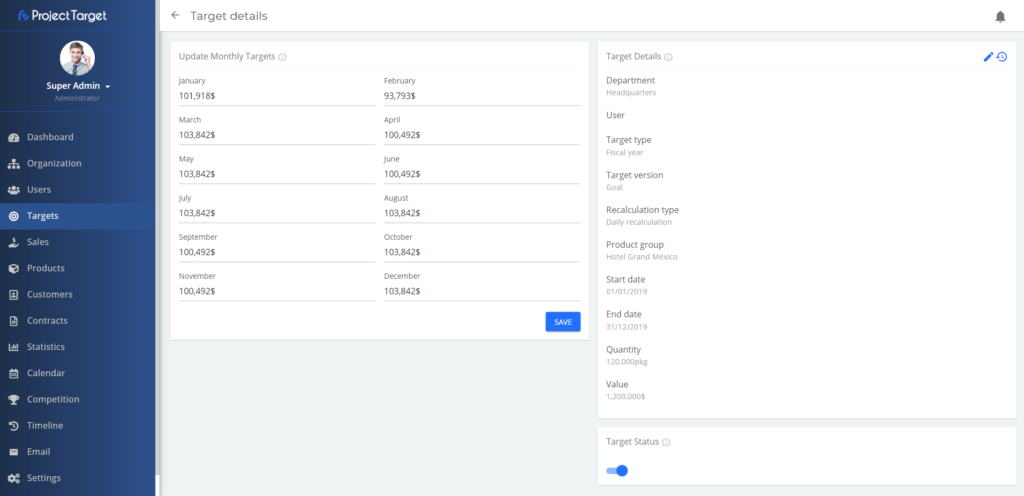
To edit targets, click on a target and you will enter the target details page. There you can edit value/quantity, and check the target history.
In case you enter target details for the Fiscal Year target, you will be able to activate/deactivate it and all of its respective targets (daily, monthly, weekly, etc.). Additionally, there is a form for multiple edits of monthly targets that belong to the Fiscal Year target.
Sales
Important things to know about the sales
Sales are the main data input in Project Target. Sales are usually being added daily.
Sales with Verified status are the most important ones – they are the only ones considered when targets are being recalculated. Future targets depend on Verified sales.
Other sales statuses are important for different KPIs.
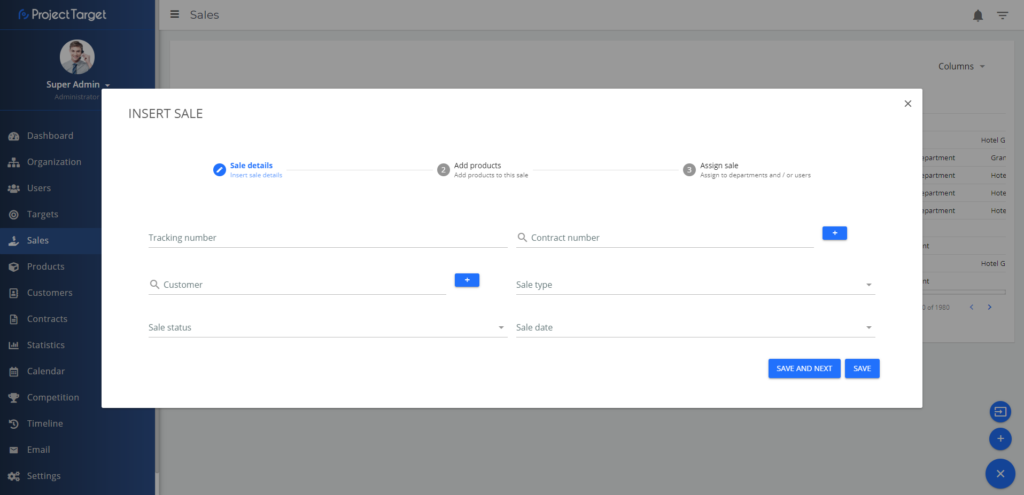
Adding new sale
Any user, with the right permissions (usually administrator or manager), can add sale in the Sales module, simply by using the button ![]()
The same sale can be assigned to multiple departments or multiple users.
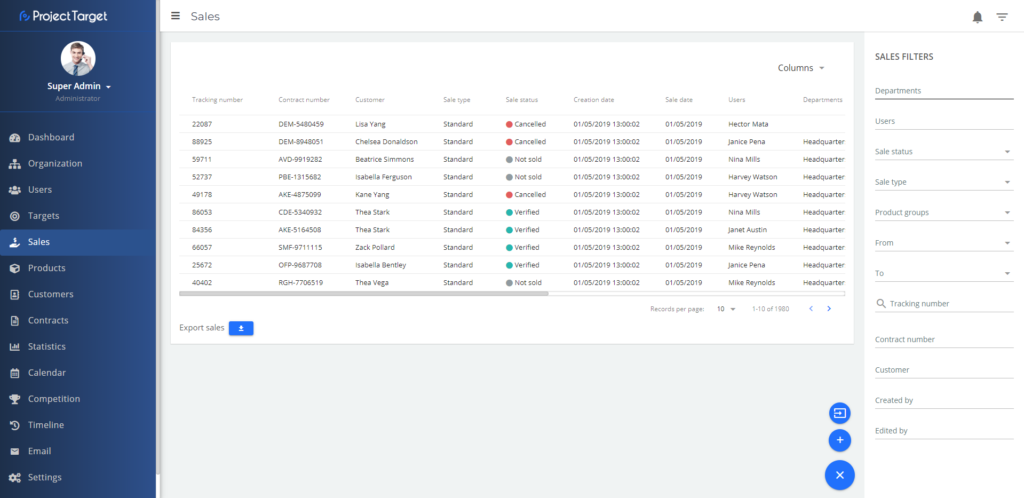
The result is a list of sales. Sales can be filtered by using the SALES FILTERS on the right side menu.
To edit sales, click on a sale and you will enter the sale details page. There you can edit customer, contract, value/quantity, sale status, sale type, sale date… You can add/remove departments/users, add/remove products and check the sale history.
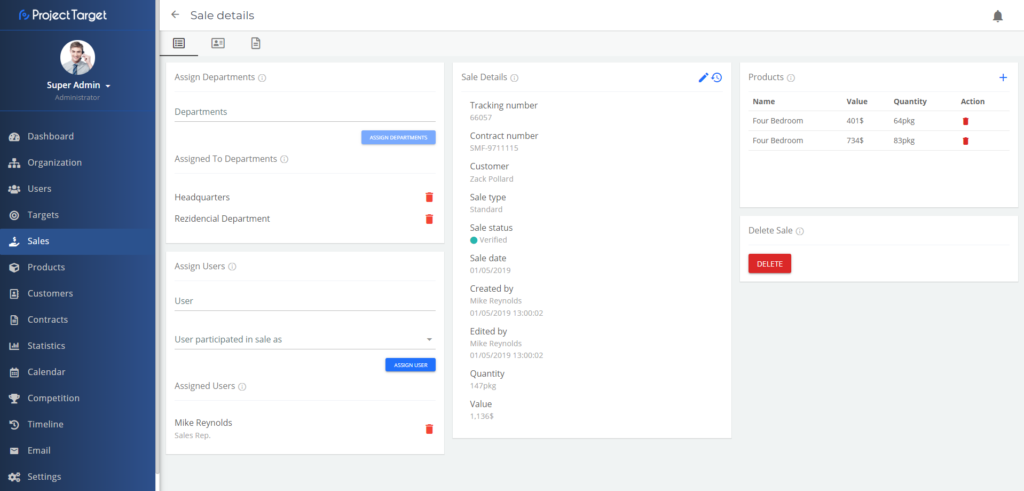
Whenever users are assigned to a sale, they will get a notification about it.
Products
Important things to know about products
Adding new products
Any user, with the right permissions (usually administrator or manager), can add products in the Products module, simply by using the button ![]()
But first, the user has to add a product group, simply by using the button ( ![]() ) in the product group tab.
) in the product group tab.
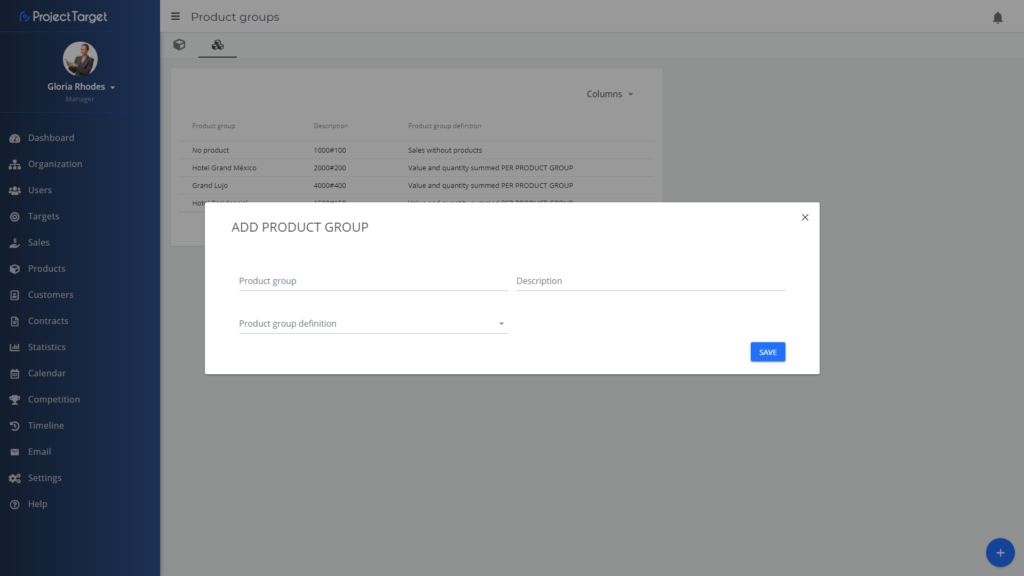
The result is a list of contracts. After adding a product group user can continue to add a product in the products tab.
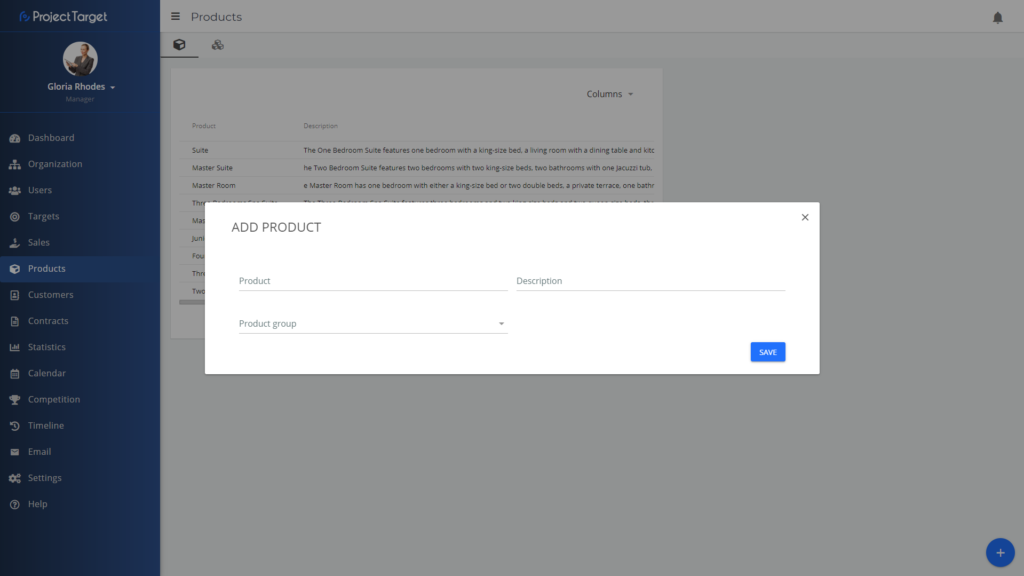
The result is a list of products.
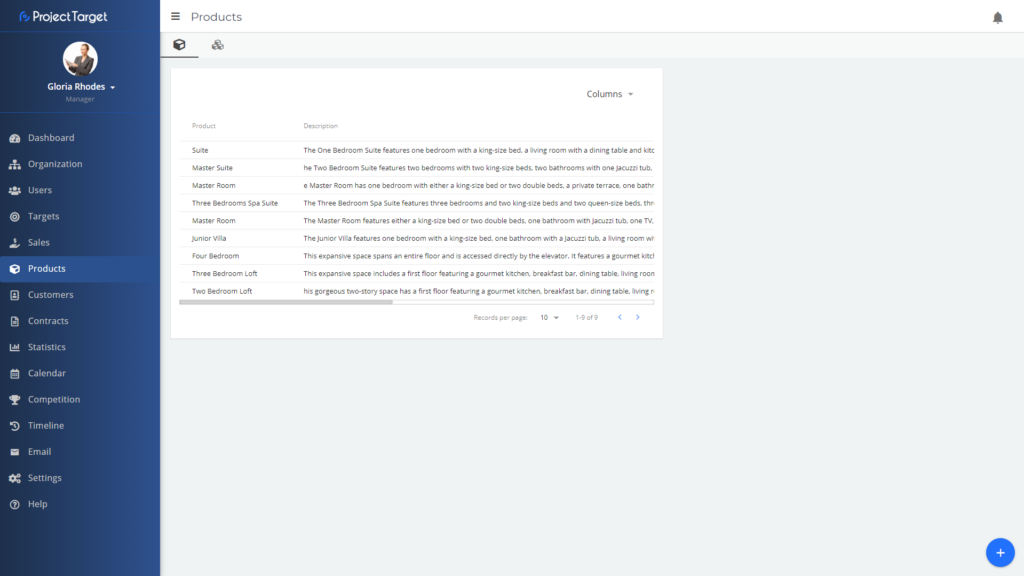
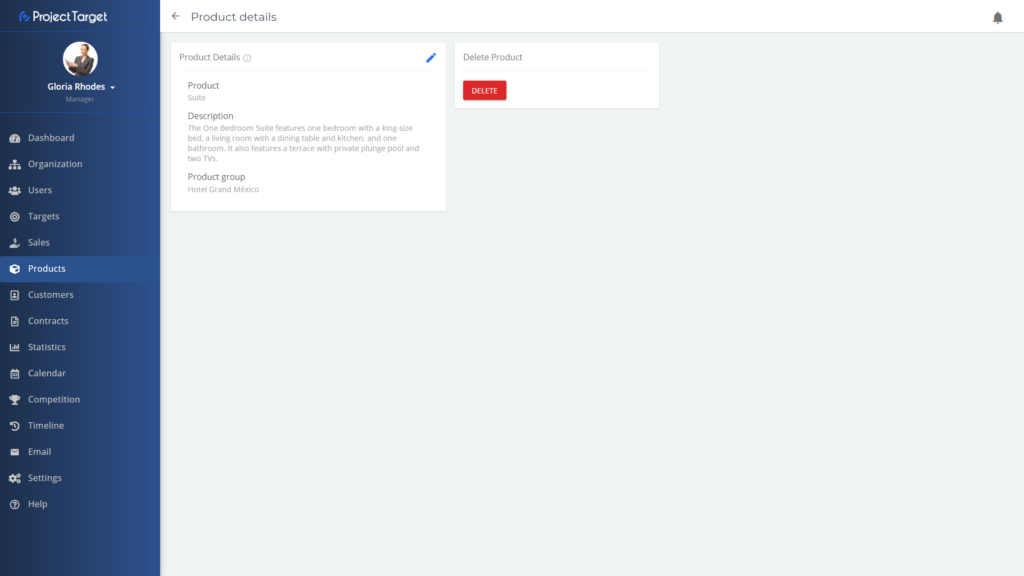
To edit products, click on a product and you will enter the product details page. There you can edit product, description and change product group. Users can delete products on this page.
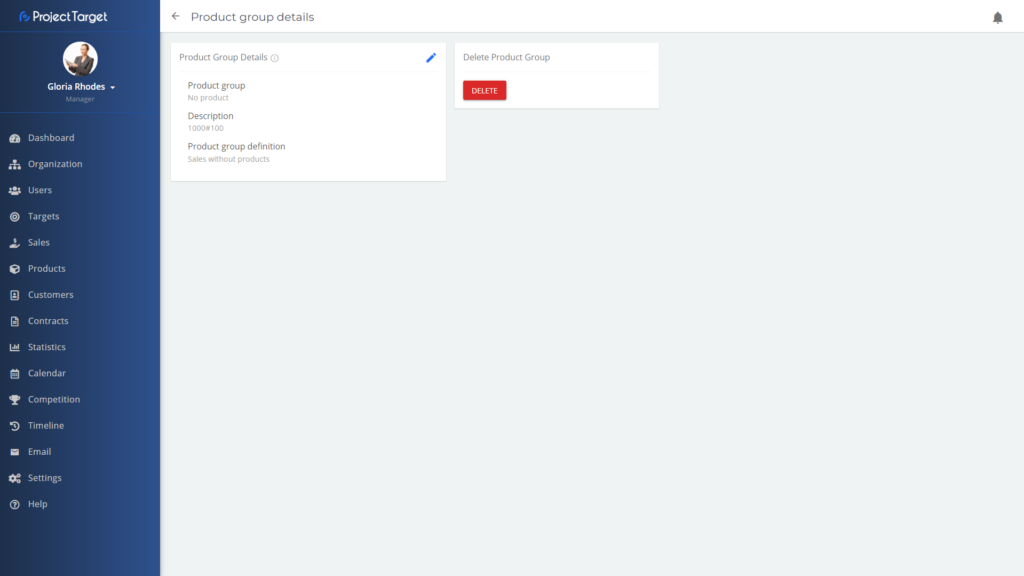
User can also edit product groups by repeating the same process, but for product groups. By clicking on a product group user will open the product group details page.
There you can edit product group, description and change product group definition. Users can delete products groups on this page.
Customers
Important things to know about customers
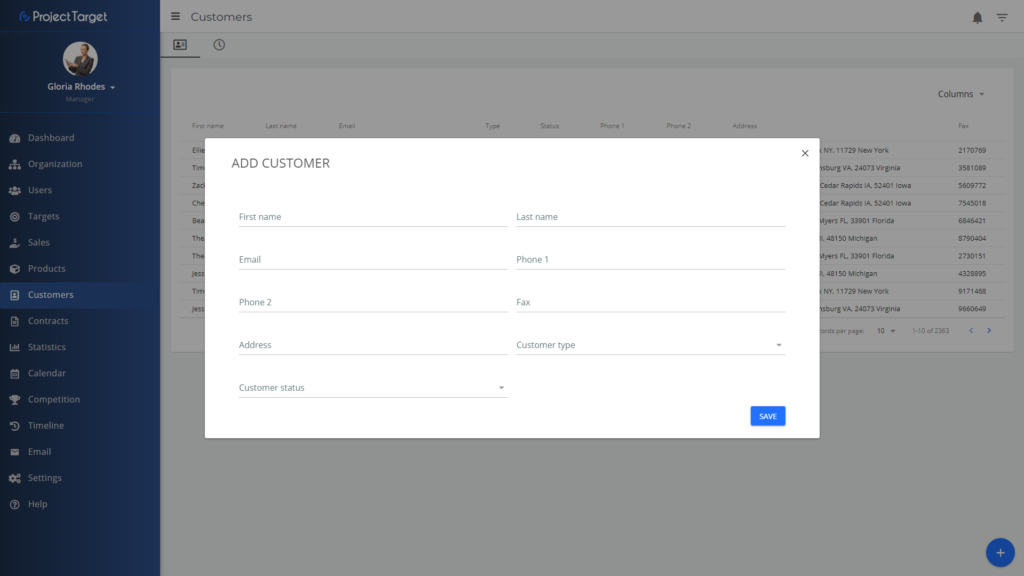
Adding new customers
Any user, with the right permissions (usually administrator or manager), can add customers in the Customers module, simply by using the button ![]()
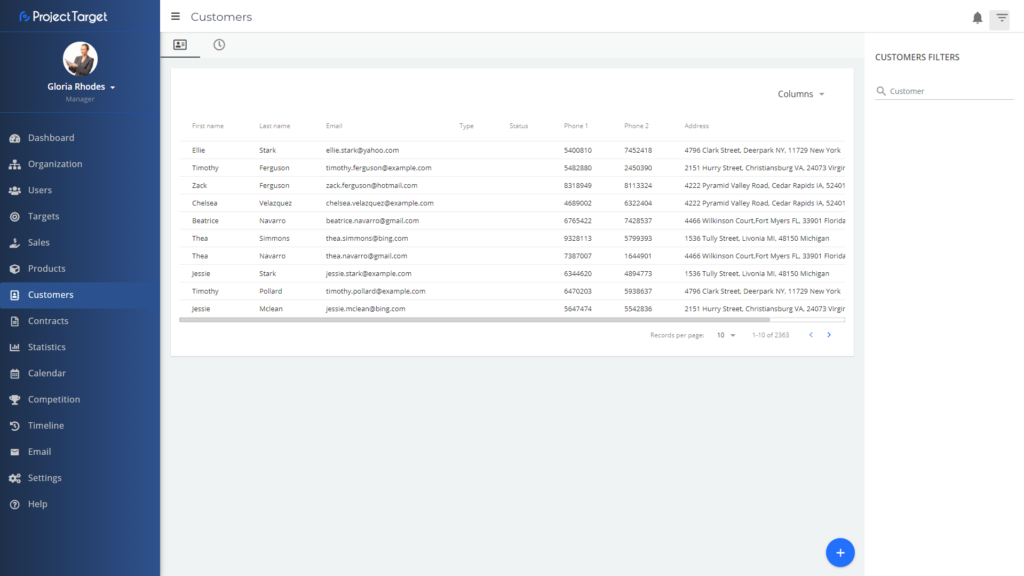
The same customer can be assigned to multiple sales.
The result is a list of contracts. Customers can be filtered by using the CUSTOMERS FILTERS on the right side menu.
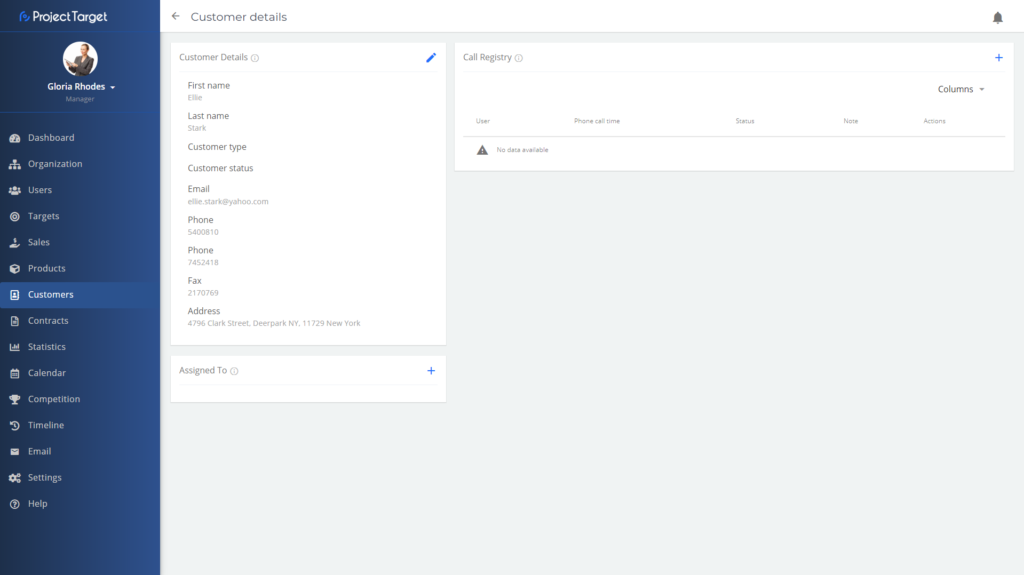
In order to edit customers data, click on a customer and you will enter the customer details page. There you can edit customers name, e-mail, phone, customer status… You can assign to/unassign users, also add/edit/remove calls.
Contracts
Important things to know about contracts
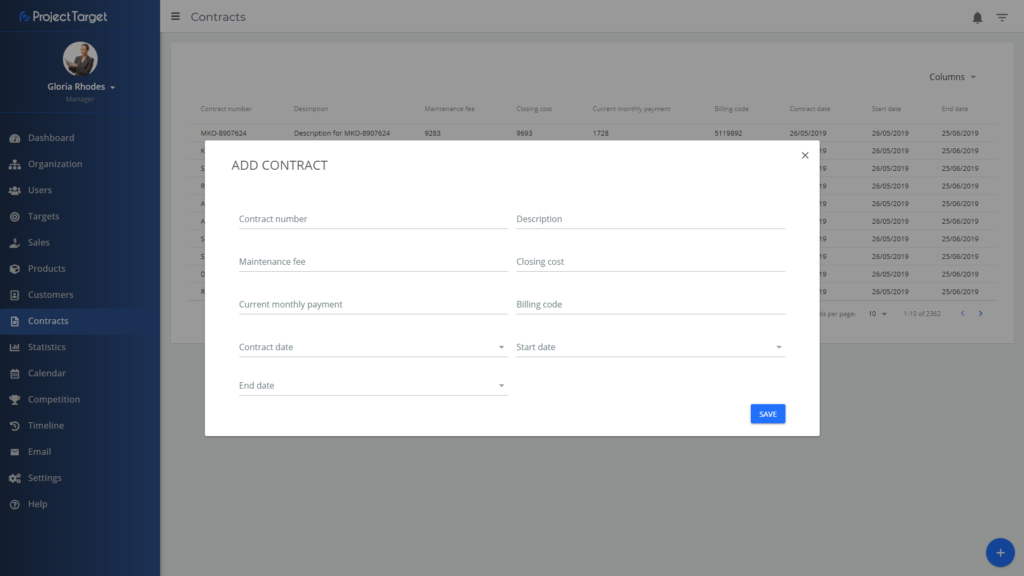
Adding new contracts
Any user, with the right permissions (usually administrator or manager), can add contracts in the Contracts module, simply by using the button ![]()
The same contract can be assigned to multiple sales.
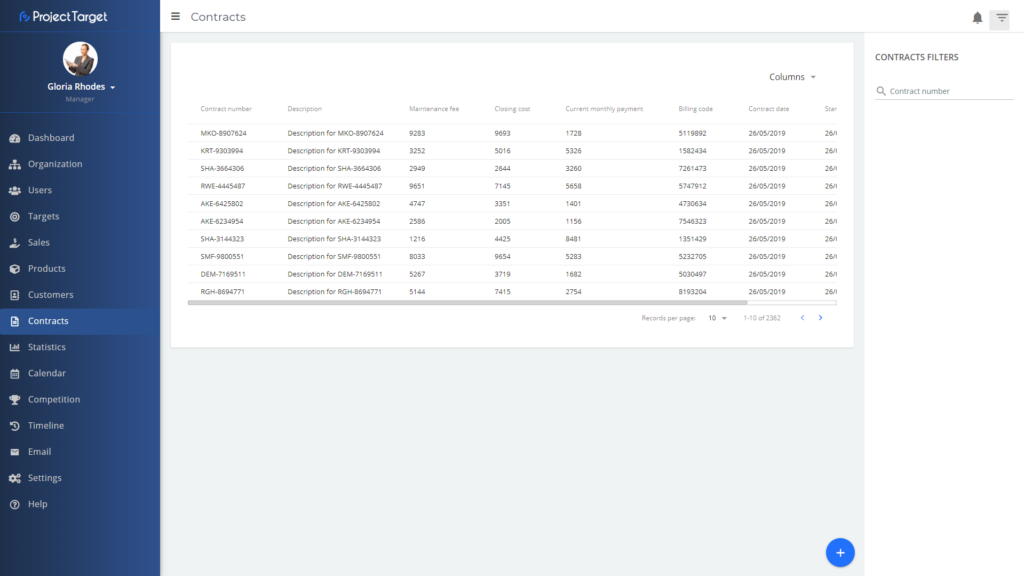
The result is a list of contracts. Sales can be filtered by using the CONTRACTS FILTERS on the right side menu.
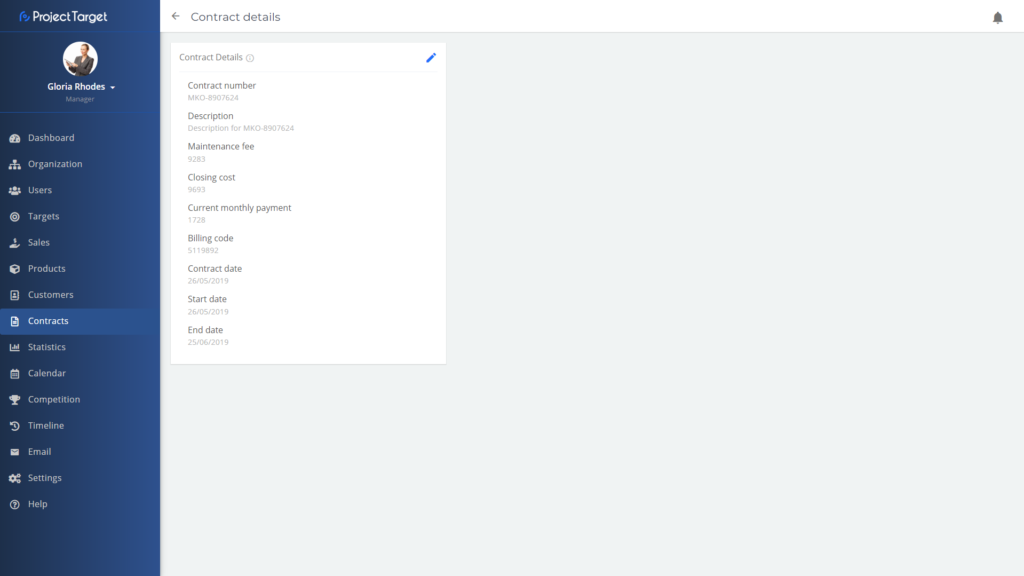
In order to edit contracts, click on a contract and you will enter the contract details page. There you can edit contract number, description, maintenance fee, contract date…
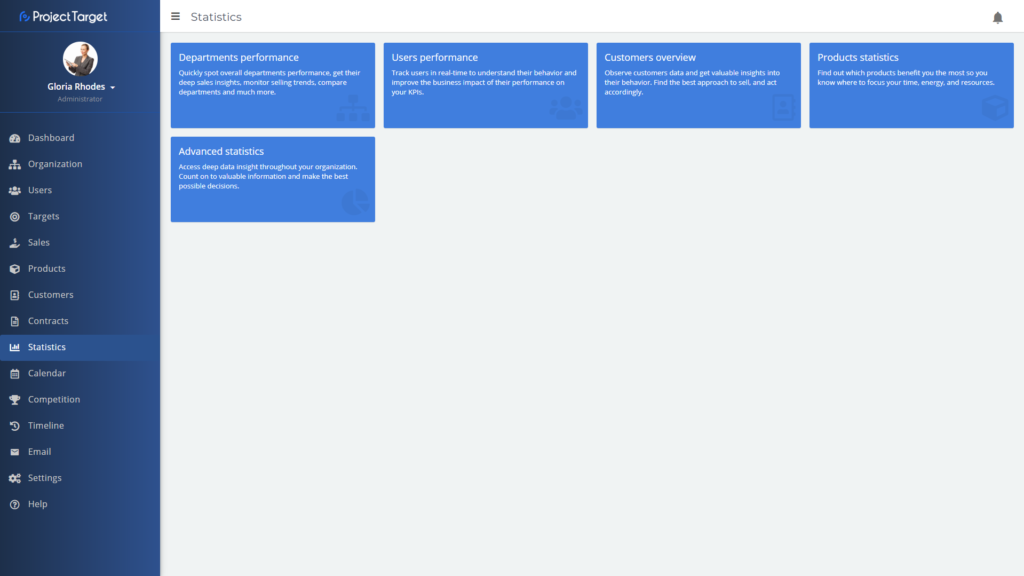
Statistics
The Statistics is on most useful modules for Users with the right permissions (usually ) that have access to this module.
Statistics contains several cards that open a new page which holds several statistics cards that will show the user requested information charts.
Competition
Important things to know about the competition
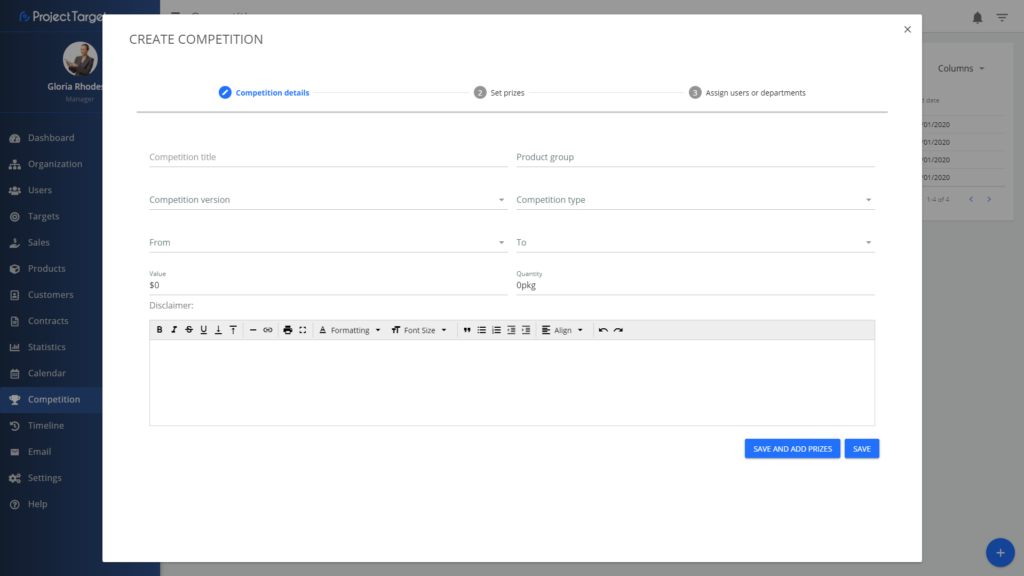
Create new competition
Any user, with the right permissions (usually administrator or manager), can create a competition in the Competition module, simply by using the button ![]()
All the user needs to do is fill in the form, set prizes and assign users to the competition.
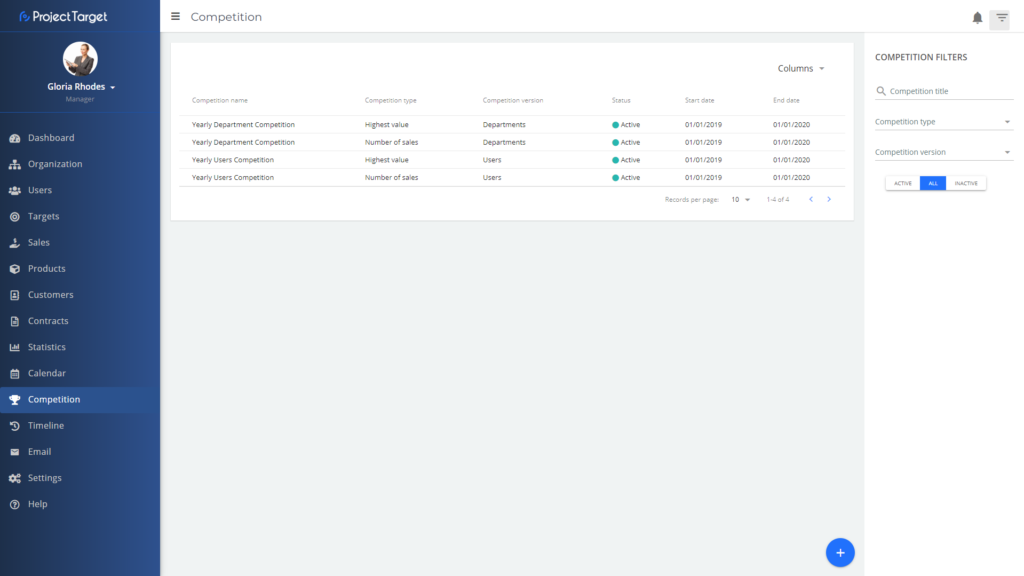
The result is a list of competitions. Competitions can be filtered by using the COMPETITION FILTERS on the right side menu.
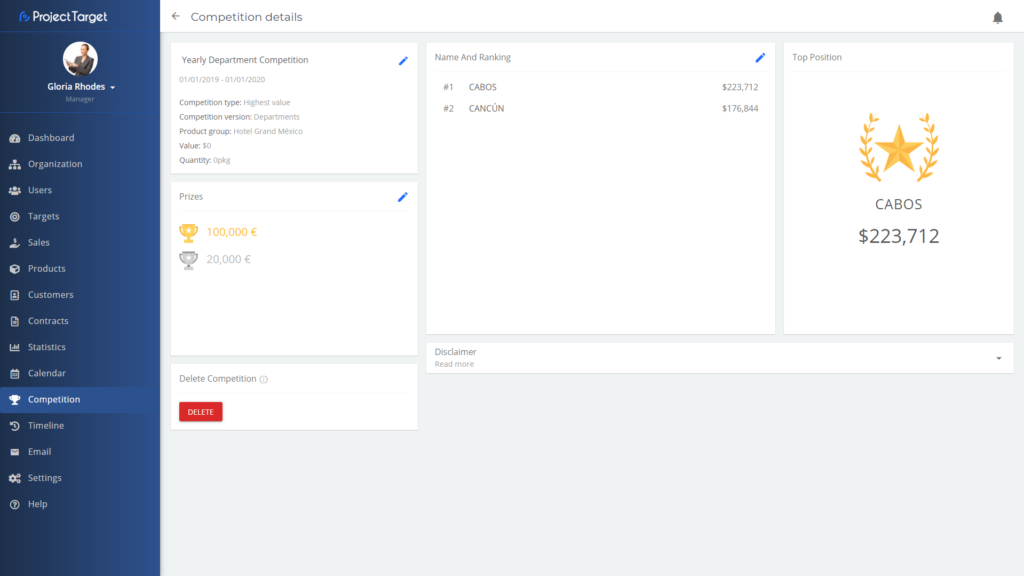
In order to edit a competition, click on one of the competitions and you will enter the competition details page. There you can edit the competitions name, competition type, competition version… User can also edit which users and departments are assigned to that competition, and delete that competition.
Timeline
Important things to know about the timeline
Timeline list
Any user, with the right permissions (usually administrator or manager), can see the Timeline module.
User with access to the timeline module can see certain user actions like:
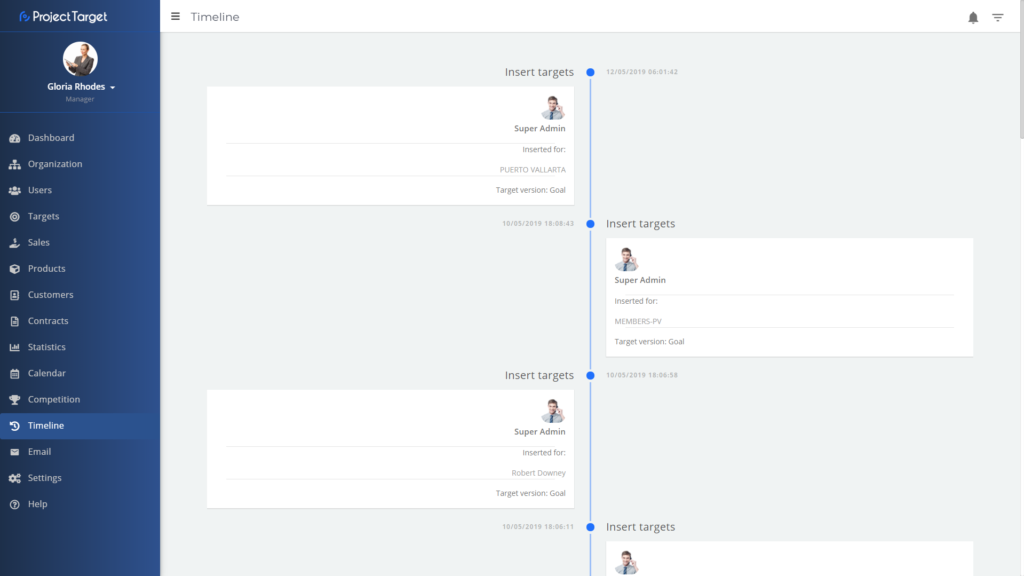
User can filter user actions by using the TIMELINE FILTERS on the right side menu.
Notifications
Important things to know about the notifications
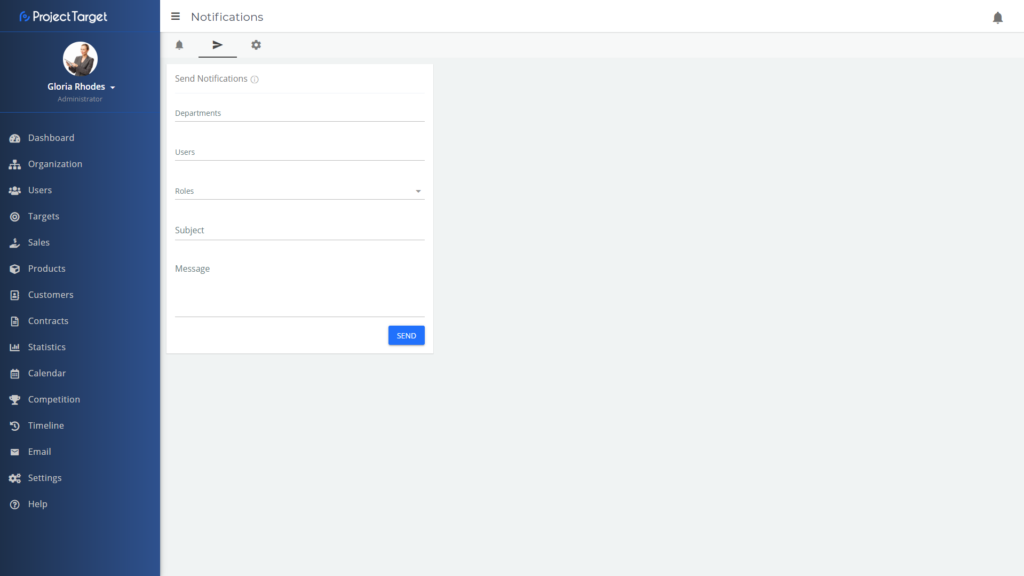
Create new notifications
All users have access to notifications, but with the right permissions (usually administrator or manager), user can create custom notifications in the Notification module, simply by clicking on the notification bell icon ![]()
User with these permissions can specify to who the notifications will be sent. It can be a certain user or a department, even roles can be included when specifying.
All users have read permissions for notification. So every user has access to notification module, user can filter notifications to see all, read or not read notifications.

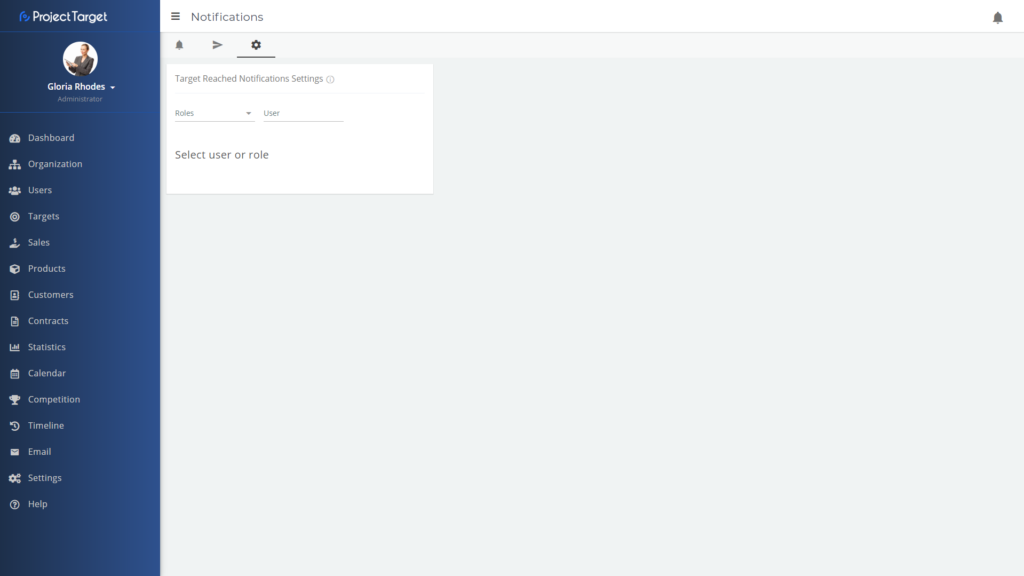
Notifications module has one more tab which a user with the right permissions can use to notify users when they reach their target.
Settings
Important things to know about the settings
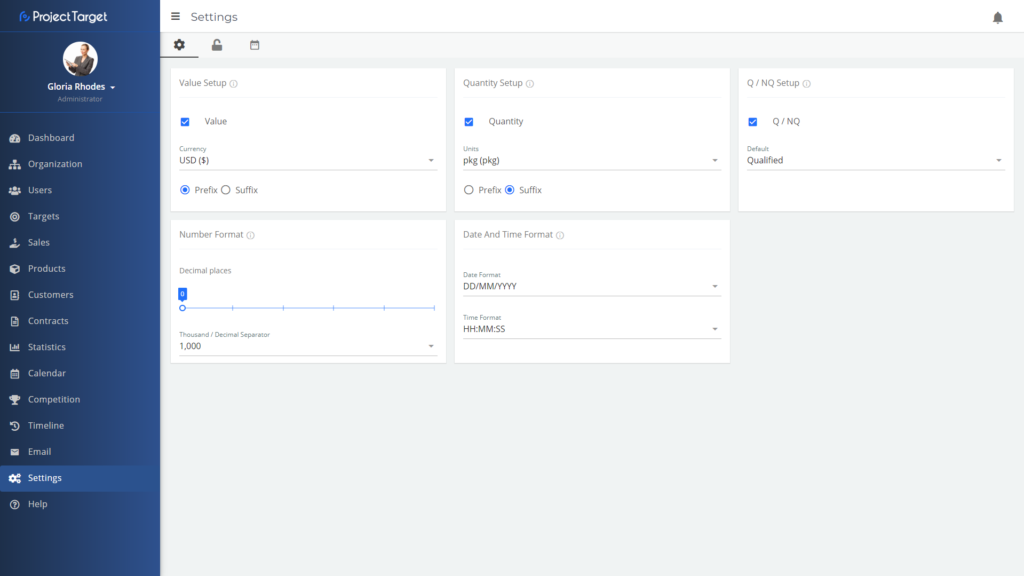
Users with the right permissions (usually administrator or manager) have access to the Settings module. They can change how the system (Project Target) functions.
User with these permissions can change if the system has value or quantity or both of them, user can change the number of decimal places, date format, turn on/off Qualified/Non Qualified setup.
In the second tab of the settings module, user can give other users or departments permissions to access other modules, and what content they have access to in those modules.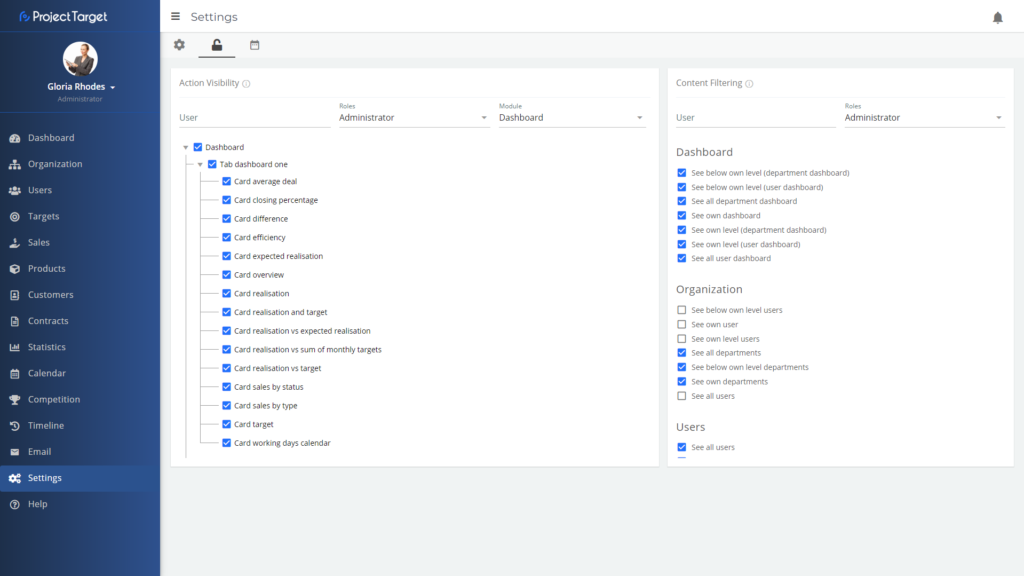
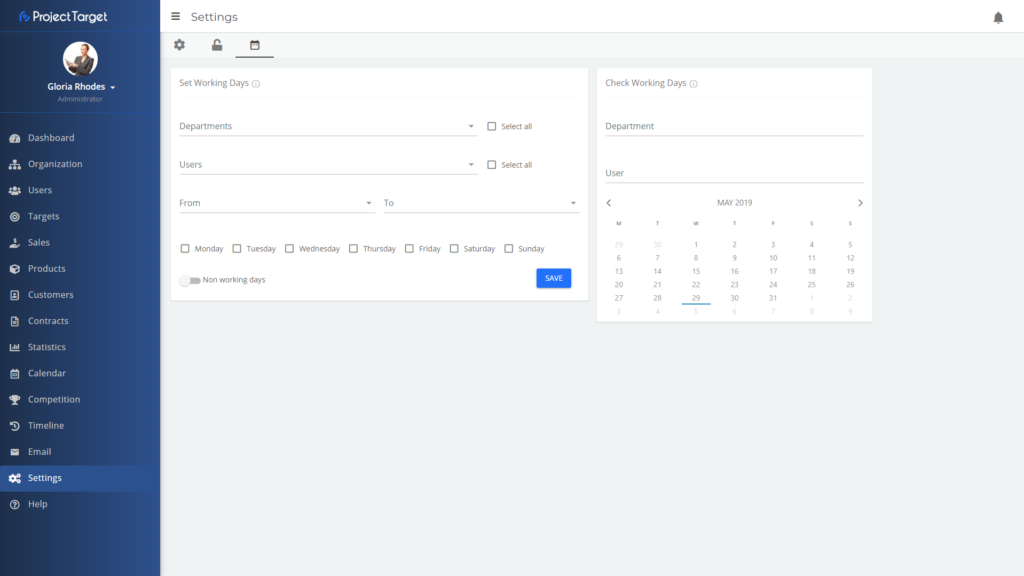
And the third tab, setting up (none) working days for multiple departments and/or users, can be done by selecting wanted departments and/or users, then choosing a date range and days of the week that should be changed, within a mentioned date range.